Showing posts with label OPI. Show all posts

8/19/14

OPI Skull and Glossbones and another waterfall mani...

I still have a huge untrieds drawer in my room full of nail polish! I know it sounds tempting to dig into that drawer but for me it it a huge burden. I want to try them all, and love them and give them little kisses... You know what I mean... But reality is harsh, I only have 10 fingernails.

Anyway, long story short, I tried one from that drawer today. It is OPI Skull and Glossbones.

I don't know about you, I seem to like grey polish more each day. Skull and Glossbones is a light grey, an off-white one may say. And it looks perfect both alone and as a stamping base.

The pictures came out a little dark, sorry for that...


Anyway, with a base like that, I thought why not make another waterfall mani? So I did it, using silvers and greys....


The topcoat smudged a little bit, but that is a small flaw for such a lovley mani in my opinion... :P

What do you think???


6/29/14

Born Pretty Store Half Round Metal Balls and Dior Porcelaine - again

I just had to use my Dior Porcelaine again. But this time I used it to show you the new studs I got from Born Pretty Store.

This time I'll show you the half round studs that you can find here. They are like tiny beads, with flat bottoms so they stick better on your nail.

They come in two sizes; 1.5 and 2 mm in silver and gold colors. Again, there are more than 350 pieces, which lasts a really long time...


Here's the mani I made...

I used two coats of Dior Pocelaine for thumb, idex and middle fingers. The problem with this polish is this; it is streaky in the first coat. But if you use a second generous coat, it settles down. Almost.... :D
I added one 2mm stud in the middle and 2 1.5 mm studs to the sides.

Anyway, for the ring finger I used OPI My Vampire is Buff with Vivid Lacquer VL10 stamping and finally for the pinky, I used OPI It's Frosty Outside.


To order these studs, visit Born Pretty Store or go directly to this page. They cost $3.28 now for about 360 studs with free international shipping. And if you want an extra 10% off, just use the code below!!!!


4/19/14

Welcome Spring - Week 3

Hi!

I am late to post my Spring mani for week 3, I know... Nowadays I just can't find time to finish my daily chores... I blame spring for this... I feel teribbly tired and I'm having a hard time getting up. More time in bed means less time for manis and blogging... I just wish days were longer... :D

Anyway, for week 3, I decided giving freehand roses another try. Do you follow Paulina's Passions? She does incredibly beautiful freehand rose manicures and I really love them. I tried to make some roses according to her tutorial and I really liked the outcome... :D

I started with 2 coats of Essie First Timer.


Then I stamped some lines using OPI My Boyfriend Scales Walls. The stamp is Gals GA21. As you can see, my nails are at their longest these days (thank God). So the Gals images hardly fit on the tips... Well, since I was going to cover them, I did not care... :D


And here comes the challenge!

I grabbed my daughters dear acrylic paints and started making my roses. I used dotting tools. I know they are not perfect, but from a distance, they look like roses... LOL


And here is an awkward hand pose to show my thumb... Honestly, I loved how the thumb turned out.

11/12/13

Blue is a color for Spring (not)

Can you believe I have never used my Barry M Gellys during summertime? What a shame!!!

Thankfully, I am not a woman of traditions... I mean, I wear my colors as I wish, not according to seasons or stuff... If I want to wear it, I wear it...

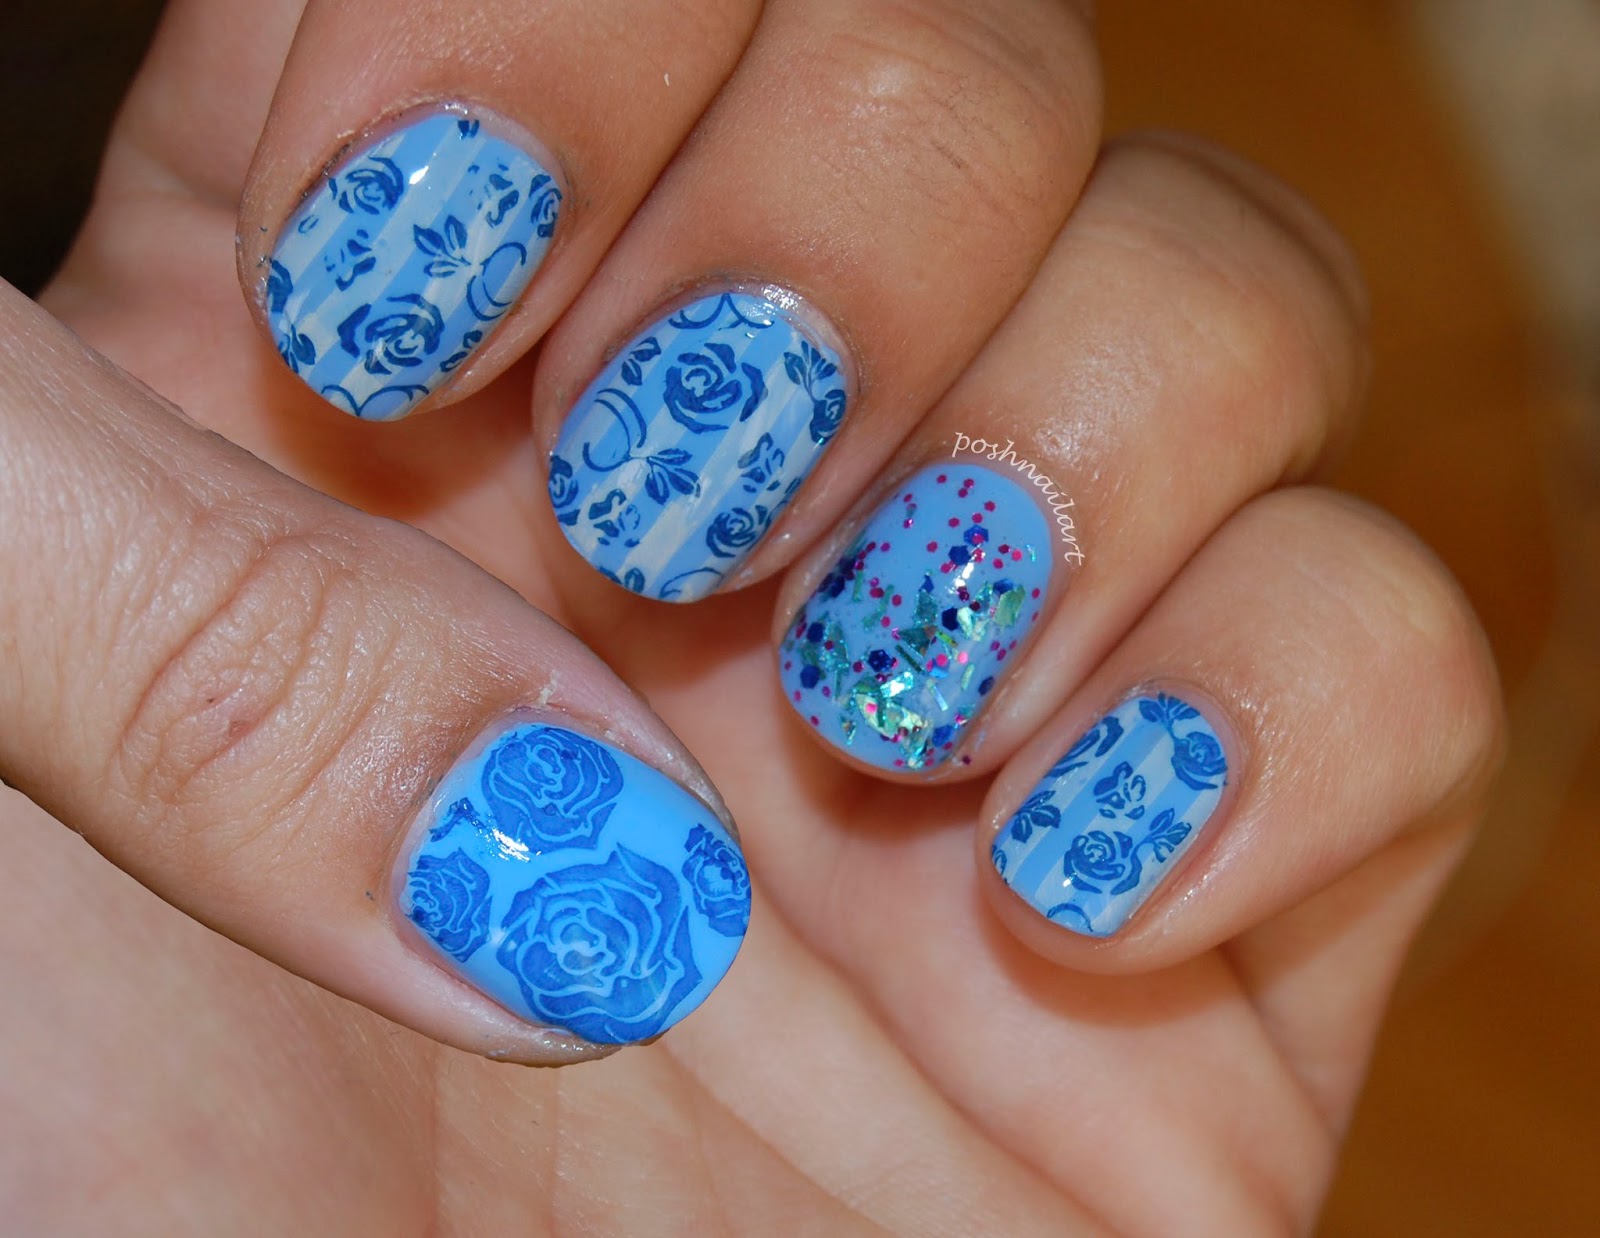
That being said, today was a sunny day and I wanted to wear my Barry M Gelly BlueBerry... :) I had 2 coats of it on my nails... Then I wanted to do someting different and I stamped the straight lines from BM411 using OPI My Vampire is Buff. For my ring finger, I wanted to add some glitter and I painted one coat plus some dabbing of Models Own Freak Out, whish was aslo an untried!

Finally, I stamped some roses using Konad m65 with Barry M Gelly BlackBerry. I can say that it stamps reaaaalllly well... :) Oh, and for my thumb, I used big roses from BM323...


 Oh and I have news for you... In a few seconds, you are going to meet my thumb... :P

My thumb does want to be involved in the pictures, but it is not bendy enough. So it always misses the photo shoots. I make some funny and creepy hand poses but still cannot achieve to get it in the picture. So, for today's shot, I took a seperate shot of it and then merged the pictures in Photoshop... So, what do you think? Do you think I should add it with photoshop or are you satisfied with 4 fingered swatches?


10/26/13

Avon Savage and Stamping Decal Trials

My Bundle Monster Create Your Own Set plates (the new 2013 ones) have arrived safely... There are so many beautiful designs in this set that you want to use them over and over again. Congratulations to all the talented ladies who contributed...

You must have seen at least a gazillion of reviews of these plates in the blogesphere, so I will not bore you again with the same images... Instead of that, I'll jump to the first mani I ever did using those gorgeous plates...

Ok, I like skittle manis a lot and this time I tried to make a different one... I used Flormar Passionate Dots Pd03 for my pinkie, a teal texture... For the ring finger, I used 2 coats of OPI My boyfriend scales walls... And for the remaning nails, I used Avon Savage, another gorgeous teal creme...


I left the pinkie as it is and for the ring finger I made my first stamping decal. Actually, after viewing a lot of tutorials on the subject, it wasn't that hard. I used the patch image from BM411, stamped it with black and painted the insides with Avon Savage... The hard part was placing it on my nail. I think Seche has some trouble with my work, so any suggestion is welcome for attaching the decal on my nail... :)


For the middle finger, I used the interlocking dots design from BM412... What a clever image is this... Think about the possibilites!!! Loved it!!! Oh, and I used Essie Good as Gold for stamping...

Well, the index figer was the one I did not like... After 2 coats of  Savage, I used a coat of silver holo topcoat and then stamped on it with Savage again using BM423... Did not turn out how I expected it to be, but still not totally bad, is it?


Ah, and no picture of the thumb but I stamped it with Essie again and the dripping image from BM405, another all time favorite!!!!

So, what do you think?

9/19/13

Textured Heaven!!! - Part 2 - OPI

Hi there... Tody we are continuing to sneak through my Textures stash... For day 2, I have OPIs for you..

Honestly, OPI Liquid Sands were the first textures I have ever tried. And the blue and the purple ones made me like textures...


This is Can't Let Go... It is a blurple with lots of glitter... One of my favorites..


And this is Get Your Number... This one has the most shiniest glitter, I'm telling you... Looks like you have jewels on your nails.


Stay the Night is nice, but did not capture my attention like its sisters...


What Wizardry Is This is the first brown/bronze shade I own... Nice but could have used some more glitter...


Honey Ryder... Just WOW!!! I like golden polish but this one is like wearing gold pieces on my nails... Warm gold color, like Solange, doesn't really look nice on my nails. But this one... WOW!!!

Formula wise, I have no problems with these... All of them need 2 coats, relatively slow drying time and gritty matte finish...

Annnd, here's today's gif... :)


Next post will be about Kikos!!!

9/6/13

Sand Polish - Gold Comparison

Here's the comparison I was talking about the other day....

Here we go...

First the bottle shots...


And next, we have the macro shots...


First impression ; Zoya Solange is a whole different shade... Even I can say that... LOL

But Pastel and OPI seem to be alike... I just think Pastel has bigger glitter partickles than OPI...

Let's see how they look like on the nail...

On my pinky, I have Pastel Magic Sand 722.

On my ring finger, I have OPI Liquid Sand Honey Ryder.

On my middle finger, I have Zoya Pixie Dust Solange.

All of them are two coats, without a base and a top coat.


The verdict : Yes, Pastel and OPI are alike. Not total dupes, because Pastel has lager glitters than OPI but the color is the same. And the gritty feel is the same. Do you need both? Hmmm, I do... :)

Oh, and I paid $4 for Pastel, $13 for OPI and $18 for Zoya... :(


8/22/13

OPI LE Mariah Carey Collection Get Your Number

Warning: Lots of photos!!!!

I have bought the OPI Mariah Carey Liquid Sands back in the winter but forgot to wear them!!! It is not unusual when you have over 550 polish... :)

So today, with the sun heating my bones and Duri Rejuvacote working miracles on my nails, I decided to wear the blue one, aka OPI Liquid Sand Polish in Get Your Number. 

It is a sheer cool blue jelly base with lots of microglitter and hologram glitter!!! It took 2 coats for full opacity and the shine was... Well, unbelievable!!!!! 

And guess what? It is not a stainer!!!! Totally easy to take it off... So who needs the stainer Liberty when you have this... :P

Edit : I recently got Liberty from Michele, so I take all my bad words back. It may be a stainer, but it is still gorgeous!!!! LOL


6/17/13

The first time I tried 2-colored stamping... :)

Here's a fact! These photos are taken on the second day...

Here's another fact! I've done two colored stamping for the first time, so please be gentle...

Well, since my Pueen plates came, I've been living a nightmare... About which plate to use first, of course! Anyway, I decided to match my nails with my outfit, so first I painted my nails with 2 coats of OPI My Boyfriend Scales Walls....

Then I picked the floral design from Pueen 25... While thinking which color to stamp with, an idea came... And I tried stamping with two colors that matched my shirt!!!!

I used Konad Blue and Sally Hansen Xtreme Wear Cherry Red for stamping. And then I used 2 coats of Golden Rose Jolly Jewels 119 on my accent nail...


I loved how this one turned out and I got many compliments... I just wish I had photographed them a day early, without the chipping... :(